Last Updated: January 2025 | Reading Time: 14 minutes
Introduction
You’re about to spend $500 to $15,000 on diffuse reflectance standards for your LiDAR or optical testing project. Make the wrong choice, and you’ll face:
- Invalid calibration data – Wasted weeks of testing with wrong targets
- Failed regulatory audits – Missing traceability or insufficient accuracy
- Project delays – Waiting for replacement targets while schedule slips
- Budget overruns – Buying twice because first purchase didn’t meet needs
Make the right choice, and you’ll have:
- Traceable, defensible data – Passes OEM and regulatory scrutiny
- Repeatable measurements – Same results today, next month, next year
- Complete validation – All test scenarios covered with appropriate targets
- Long-term value – Targets last 5-10 years with proper care
The difference? Understanding seven critical specifications that separate professional-grade reflectance standards from inadequate substitutes.
This guide walks you through each specification with:
- What it means (plain English explanation)
- Why it matters (real-world impact on your project)
- How to evaluate (what to look for on datasheets)
- Red flags (warning signs of poor quality)
- Recommendations (specific values for different applications)
By the end, you’ll confidently select reflectance standards that match your technical requirements, budget, and timeline—avoiding costly mistakes that plague 40% of first-time buyers.
What you’ll learn:
- Reflectance accuracy requirements (±0.5% vs ±2% vs ±5%)
- Wavelength compatibility critical considerations
- Why Lambertian conformity >95% is non-negotiable
- Size calculations for your testing distance
- Environmental stability specifications
- Certification and traceability requirements
- Substrate material trade-offs
1. Overview: The Seven Specifications
Before diving into details, here’s a quick reference table showing how specifications impact different use cases:
| Specification | Entry-Level | Professional | Research/Metrology |
|---|---|---|---|
| 1. Reflectance Accuracy | ±5% | ±2% | ±0.5-1% |
| 2. Wavelength Range | Visible (400-700nm) | Sensor-specific (±100nm) | Full spectrum (200-2000nm) |
| 3. Lambertian Conformity | 80-90% | >95% | >98% |
| 4. Size | Budget allows | 3× spot diameter | 5× spot diameter |
| 5. Environmental Stability | Indoor only | ±1%/40°C | ±0.5%/40°C |
| 6. Certification | None/basic | NIST-traceable | NIST + uncertainty budget |
| 7. Substrate | ABS/composite | Aluminum | Ceramic/glass |
| Typical Cost | $200-500 | $800-3,000 | $1,500-8,000 |
| Applications | Education, demos | Automotive, industrial | Standards labs, publications |
Key principle: Don’t over-specify (waste money) or under-specify (waste time with inadequate targets). Match specifications to your actual requirements.
2. Specification #1: Reflectance Accuracy
What It Means
Reflectance accuracy is the maximum deviation between the target’s actual reflectance and its nominal (stated) value.
Example:
- Nominal reflectance: 50%
- Accuracy: ±2%
- Actual reflectance: Somewhere between 48% and 52%
Why It Matters
Your LiDAR intensity calibration is only as accurate as your reference target.
Scenario: You’re calibrating a LiDAR for pedestrian detection. Specification: “Detect 15% reflectance target at 80m.”
With ±2% accuracy target (13-17% range):
- You test with “15% target” that’s actually 17%
- LiDAR passes test (detects at 80m)
- Deploy to field: Real 13% pedestrian → missed detection → accident
With ±5% accuracy target (10-20% range):
- Even worse—33% uncertainty band
- Completely invalidates safety-critical testing
With ±1% accuracy target (14-16% range):
- Tight tolerance ensures test matches real world
- Valid safety validation
Industry Standards
| Application | Required Accuracy | Rationale |
|---|---|---|
| Automotive safety (ASIL-D) | ±1-2% | Safety-critical, regulatory compliance |
| Aerospace/defense | ±1-2% | Mission-critical systems |
| Industrial QC | ±3-5% | Acceptable for most manufacturing |
| Research publications | ±0.5-1% | Peer review requires high confidence |
| Education/demonstrations | ±5-10% | Illustrative purposes only |
How to Evaluate
On the datasheet/certificate, look for:
✓ Explicit accuracy statement:
- Good: “Reflectance: 50.0% ±2% (at 905nm, k=2)”
- Bad: “Approximately 50% reflective”
✓ Wavelength-specific:
- Good: “49.8% at 905nm, 50.2% at 1550nm”
- Bad: “50% average across visible spectrum”
✓ Measured, not claimed:
- Good: Certificate shows actual spectrophotometer measurement: 50.1%
- Bad: No measurement data, just “50% nominal”
Red Flags
❌ No accuracy specification at all
- “Diffuse gray target” with no ±X%
- Indicates uncalibrated consumer product
❌ Accuracy varies wildly with wavelength
- “50% ±2% at 550nm, but 45% at 905nm”
- Not a true “50%” target for NIR applications
❌ “Typical” accuracy
- “Typically within ±5%”
- “Typical” means some units are worse—you might get a bad one
❌ Accuracy claims without measurement data
- “Calibrated to 50% ±1%” but certificate just shows nominal value
- No actual measurement = not really calibrated
Cost vs. Accuracy Trade-off
| Accuracy Grade | Typical Cost (1m target) | Manufacturing Method |
|---|---|---|
| ±0.5% (metrology) | $5,000-8,000 | Spectralon®, lab-grade |
| ±1% (premium) | $2,500-4,000 | Ceramic, tightly controlled |
| ±2% (professional) | $1,000-2,000 | Aluminum/ceramic, standard |
| ±5% (industrial) | $400-800 | ABS, good QC |
| ±10% (entry) | $200-400 | ABS, basic QC |
Recommendation:
For automotive/aerospace safety systems: ±2% minimum, ±1% if budget allows
Justification: ISO 26262 requires calibration equipment to be 3-5× more accurate than device under test. If your LiDAR has ±5-10% intensity accuracy spec, you need ±1-2% reference targets.
For industrial testing: ±3-5% acceptable for non-safety-critical applications
For research: ±1% or better (peer reviewers will question higher uncertainty)
How Accuracy is Measured
Professional manufacturers measure reflectance using:
Spectrophotometer with integrating sphere:
- Illuminates target with known spectrum
- Collects all reflected light (captures diffuse reflection)
- Compares to reference standard (BaSO₄ or Spectralon®)
- Calculates reflectance at each wavelength
Measurement uncertainty budget:
Total uncertainty comes from:
- Reference standard uncertainty: ±0.3%
- Spectrophotometer repeatability: ±0.2%
- Sample positioning: ±0.1%
- Temperature effects: ±0.1%
- Wavelength calibration: ±0.1%
Combined (RSS): ±0.4% (k=1, 68% confidence) Expanded (k=2): ±0.8% (95% confidence)
This is how ±1% accuracy is achieved—requires careful metrology.
Practical Example: Automotive LiDAR
Requirement: Distinguish between:
- Dark vehicle (20% reflectance)
- Pedestrian dark clothing (15% reflectance)
Intensity difference: 5 percentage points
Test with ±5% accuracy targets:
- “20% target” could be 15-25%
- “15% target” could be 10-20%
- Overlap: 15-20% range → Cannot reliably test classification algorithm
Test with ±1% accuracy targets:
- “20% target” = 19-21%
- “15% target” = 14-16%
- No overlap → Valid algorithm training and testing ✓
Conclusion: For 5-percentage-point discrimination, need ≤±1% target accuracy.
3. Specification #2: Wavelength Range and Spectral Uniformity
What It Means
Wavelength range: The span of wavelengths over which the target is calibrated and maintains specified reflectance.
Spectral uniformity: How much reflectance varies across that wavelength range.
Example:
- Wavelength range: 400-1100nm (visible + NIR)
- Spectral uniformity: <3% variation across range
- Meaning: If target is 50% at 500nm, it’s 48.5-51.5% at any wavelength from 400-1100nm
Why It Matters
Critical insight: A material’s reflectance is wavelength-dependent. What appears 50% gray to your eyes (visual assessment at 550nm) may be 30% or 70% at your LiDAR’s wavelength (905nm or 1550nm).
Real-world disaster scenario:
Engineer purchases “50% gray card” from photography store:
- Visual appearance: 50% (measured at 550nm)
- Actual at 905nm: 35%
- Calibrates 905nm LiDAR using this target
- LiDAR intensity algorithm trained with 30% error
- Deployed system misclassifies objects → safety incident
Cost: Recall, liability, reputation damage = $50M+
Cause: $20 wrong target instead of $800 proper target
Wavelength Matching Requirements
| Your Sensor | Required Target Wavelength Range | Calibvision Model |
|---|---|---|
| RGB camera | 400-700nm (visible) | DRS-R[XX]V |
| Monochrome industrial camera | 400-900nm (visible + NIR) | DRS-R[XX]N |
| 850nm LiDAR (short-range) | 800-900nm minimum | DRS-R[XX]N or DRS-R[XX]L |
| 905nm LiDAR (automotive) | 850-950nm minimum | DRS-R[XX]L |
| 940nm ToF sensor | 890-990nm minimum | DRS-R[XX]L |
| 1550nm LiDAR (long-range) | 1500-1600nm minimum | DRS-R[XX]L |
| Multi-spectral system | Full sensor range | DRS-R[XX]F (full spectrum) |
| Camera + LiDAR fusion | 400-1100nm or wider | DRS-F[XX]N or DRS-F[XX]F |
Rule of thumb: Target must be calibrated at your sensor wavelength ±50nm minimum, ±100nm better.
Spectral Uniformity: Why <3% Matters
Even within the specified range, reflectance shouldn’t vary dramatically.
Example: Poor spectral uniformity
| Wavelength | Reflectance | Note |
|---|---|---|
| 450nm (blue) | 48% | |
| 550nm (green) | 51% | Nominal “50%” |
| 650nm (red) | 52% | |
| 850nm (NIR) | 38% | ❌ 25% drop! |
| 905nm (LiDAR) | 35% | ❌ 30% drop! |
This target is “50%” in visible, but “35%” for 905nm LiDAR—completely wrong for NIR applications.
Example: Good spectral uniformity (Calibvision DRS-L series)
| Wavelength | Reflectance | Variation |
|---|---|---|
| 450nm | 49.8% | -0.4% |
| 550nm | 50.1% | +0.2% |
| 650nm | 50.0% | 0% |
| 850nm | 49.5% | -1.0% |
| 905nm | 49.7% | -0.6% |
| 1550nm | 50.3% | +0.6% |
Maximum variation: 1.2% (from 49.5% to 50.3%) → <3% specification met ✓
How to Evaluate
On calibration certificate, look for:
✓ Spectral reflectance curve
- Graph showing reflectance vs. wavelength (400-2000nm)
- Should be relatively flat across specified range
- Sharp drops/peaks indicate poor uniformity
✓ Reflectance at your specific wavelength
- Not just “50% average” but “50.2% at 905nm”
- Certificate should explicitly state value at your wavelength
✓ Uniformity specification
- “Spectral uniformity: <3% variation across 400-1100nm”
- Or: “Reflectance: 50% ±1.5% from 400-1100nm”
Red Flags
❌ Only visible spectrum calibration
- Certificate shows data 400-700nm, nothing beyond
- Useless for NIR or LiDAR applications
❌ “Broadband” or “white light” calibration
- Measured under tungsten lamp or D65 illuminant
- Doesn’t show wavelength-specific values
- Hides potential NIR reflectance issues
❌ Huge wavelength gaps
- Certificate shows: 450nm, 550nm, 650nm (visible only)
- Missing: 850nm, 905nm, 1550nm (LiDAR wavelengths)
- Can’t verify performance at your wavelength
❌ Visual description only
- “Appears 50% gray”
- “Neutral gray color”
- Visual appearance ≠ NIR reflectance
Material Science: Why Wavelength Matters
Different scattering mechanisms dominate at different wavelengths:
Rayleigh scattering (λ << particle size):
- Scattering ∝ 1/λ⁴
- Affects short wavelengths (blue) more than long (red/NIR)
Mie scattering (λ ≈ particle size):
- Complex wavelength dependence
- Pigment particles in paint/coatings are typically 0.1-1μm
- Optimal scattering at visible wavelengths (500nm)
- Different scattering at NIR (900nm+)
This is why paint that looks “50% gray” may be 35% at 905nm—the pigment particles scatter visible light efficiently but less so at NIR.
Calibvision solution: Engineered particle size distribution (100nm-1μm range) ensures scattering across full spectrum (400-1550nm).
Testing Multiple Wavelengths
If you have multiple sensors (e.g., RGB camera + 905nm LiDAR):
Option A: Separate targets for each wavelength
- DRS-R50V for camera (400-700nm)
- DRS-R50L for LiDAR (905nm)
- Cost: 2× targets
- Advantage: Optimized for each sensor
Option B: Single broadband target
- DRS-R50N (400-1100nm) or DRS-R50F (200-2000nm)
- Cost: 1× target (more expensive per unit but cheaper overall)
- Advantage: Same reference for both sensors
Recommendation: For sensor fusion applications (camera + LiDAR), use broadband or full-spectrum targets to ensure same target works for both.
Practical Decision Guide
If your sensor is:
RGB camera only: → DRS-R[XX]V (visible spectrum) is sufficient and cheapest
NIR industrial camera (850-900nm): → DRS-R[XX]N (extended NIR) required
905nm automotive LiDAR: → DRS-R[XX]L (LiDAR-specific) required → Verify certificate shows value at 905nm
1550nm long-range LiDAR: → DRS-R[XX]L (LiDAR-specific) required → Important: 905nm and 1550nm targets may differ—ask for both wavelengths on certificate
Camera + LiDAR fusion: → DRS-F[XX]N or DRS-F[XX]F (fusion series with broad spectral coverage)
Research covering UV to NIR: → DRS-R[XX]F (full spectrum 200-2000nm)
4. Specification #3: Lambertian Conformity
What It Means
Lambertian conformity quantifies how closely a surface follows Lambert’s cosine law—the ideal diffuse reflection model where reflected intensity varies as cos(θ) with viewing angle θ.
Measurement: Percentage of how well measured angular response matches theoretical Lambertian behavior.
Example:
- Lambertian conformity: 95%
- Meaning: Across ±60° viewing angles, intensity matches ideal Lambertian prediction within 5%
Why It Matters
LiDAR sensors rarely hit targets perfectly perpendicular. Real-world scenarios:
- Vehicle-mounted LiDAR scanning road ahead: Target at 0-30° angles
- Robotic manipulator viewing workspace: Target at varying angles
- Multi-LiDAR setup: Same target viewed from different positions
With good Lambertian target (>95% conformity):
- Intensity at angle θ = I₀ × cos(θ) (predictable)
- Can correct for angle using simple formula
- Calibration valid across all mounting configurations
With poor Lambertian target (<80% conformity):
- Intensity varies unpredictably with angle
- Cannot reliably correct
- Calibration only valid at perpendicular mounting → unusable for real applications
The Math: Lambert’s Cosine Law
Ideal Lambertian surface:
I(θ) = I₀ × cos(θ)
Where:
- I(θ) = Intensity at angle θ from surface normal
- I₀ = Intensity at 0° (perpendicular)
- θ = Viewing angle (0° = perpendicular, 90° = edge-on)
Expected intensities:
| Angle | cos(θ) | Expected I/I₀ |
|---|---|---|
| 0° | 1.000 | 100% |
| 30° | 0.866 | 86.6% |
| 45° | 0.707 | 70.7% |
| 60° | 0.500 | 50.0% |
Real target with 95% conformity:
| Angle | Expected | Measured | Deviation |
|---|---|---|---|
| 0° | 100% | 100% | 0% |
| 30° | 86.6% | 85.2% | -1.6% ✓ |
| 45° | 70.7% | 68.9% | -2.5% ✓ |
| 60° | 50.0% | 47.8% | -4.4% ✓ |
Maximum deviation: 4.4% → Conformity = 100% – 4.4% = 95.6% ✓
Real target with 75% conformity (poor):
| Angle | Expected | Measured | Deviation |
|---|---|---|---|
| 0° | 100% | 100% | 0% |
| 30° | 86.6% | 78.2% | -9.7% ❌ |
| 45° | 70.7% | 58.3% | -17.5% ❌ |
| 60° | 50.0% | 32.1% | -35.8% ❌ |
At 60°, measured value is 36% lower than expected—impossible to calibrate reliably.
Real-World Impact: Automotive Example
Scenario: Testing LiDAR on vehicle approaching stopped car at angle
Setup:
- LiDAR mounted on roof, looking forward and down
- Target (simulated vehicle) on ground ahead
- LiDAR beam hits target at 20° from perpendicular
With >95% Lambertian target:
- Expected intensity: I₀ × cos(20°) = I₀ × 0.940
- Measured: 0.933 × I₀ (1% low)
- Calibration valid ✓
With 75% Lambertian target:
- Expected: I₀ × 0.940
- Measured: 0.840 × I₀ (10.6% low)
- Calibration off by 10% → algorithm misclassifies object reflectance ❌
At highway speed (120 km/h), this 10% error could be difference between braking and collision.
How to Evaluate
On calibration certificate, look for:
✓ Explicit Lambertian conformity percentage
- “Lambertian conformity: >95% across ±60°”
- Shows manufacturer measured angular response
✓ Angular response data
- Table or graph: Angle vs. Intensity
- Should show measurements at 0°, ±30°, ±60° minimum
- Compare to theoretical cos(θ) curve
✓ BRDF data (advanced)
- Bidirectional Reflectance Distribution Function
- Complete angular characterization
- Research-grade targets include this
Red Flags
❌ No Lambertian conformity specification
- Just says “diffuse surface”
- Doesn’t quantify how well it follows cosine law
❌ Only tested at 0° (perpendicular)
- “Reflectance: 50% at normal incidence”
- No data at other angles → unknown Lambertian behavior
❌ Conformity only at visible wavelengths
- Certificate shows “95% conformity at 550nm”
- Silent on NIR wavelengths—may be different
❌ “Diffuse” without quantification
- Marketing language like “matte finish” or “non-glossy”
- Not the same as measured Lambertian conformity
Quality Grades
| Lambertian Conformity | Quality Grade | Typical Applications | Typical Cost Premium |
|---|---|---|---|
| >98% | Metrology | Standards labs, research | +100% |
| 95-98% | Professional | Automotive, aerospace | Baseline |
| 90-95% | Industrial | General testing | -20% |
| 80-90% | Entry-level | Education, demos | -40% |
| <80% | Inadequate | Not suitable for calibration | Avoid |
Recommendation by Application
Automotive/aerospace safety systems: >95% conformity required
Reason: Sensors view targets at varying angles (0-30° typical). Need predictable angular response for valid calibration across mounting configurations.
Industrial QC (controlled setup): 90-95% acceptable
Reason: If you can consistently mount target perpendicular (±5°), slight angular dependence has minimal impact.
Research/publications: >95% required, >98% preferred
Reason: Peer reviewers will question methodology if targets have poor Lambertian properties.
Testing Lambertian Conformity (DIY Verification)
If you want to verify a target’s Lambertian properties:
Simple test:
- Mount target perpendicular to LiDAR (0°)
- Measure intensity: I₀
- Rotate target to 30°
- Measure intensity: I₃₀
- Calculate ratio: I₃₀ / I₀
Expected (Lambertian): I₃₀ / I₀ = cos(30°) = 0.866
If measured ratio is:
- 0.85-0.88: Good (≈95% conformity) ✓
- 0.80-0.85: Acceptable (≈90% conformity)
- <0.80 or >0.95: Poor conformity ❌
Repeat at 45° and 60° for more complete characterization.
Azimuthal Symmetry (Bonus Check)
True Lambertian surface is rotationally symmetric:
- Rotate target 90° about its normal (face-on rotation)
- Intensity should remain constant (±2%)
If intensity changes >5% with rotation:
- Target has directional properties (grain, anisotropic coating)
- Not truly Lambertian—may cause measurement artifacts
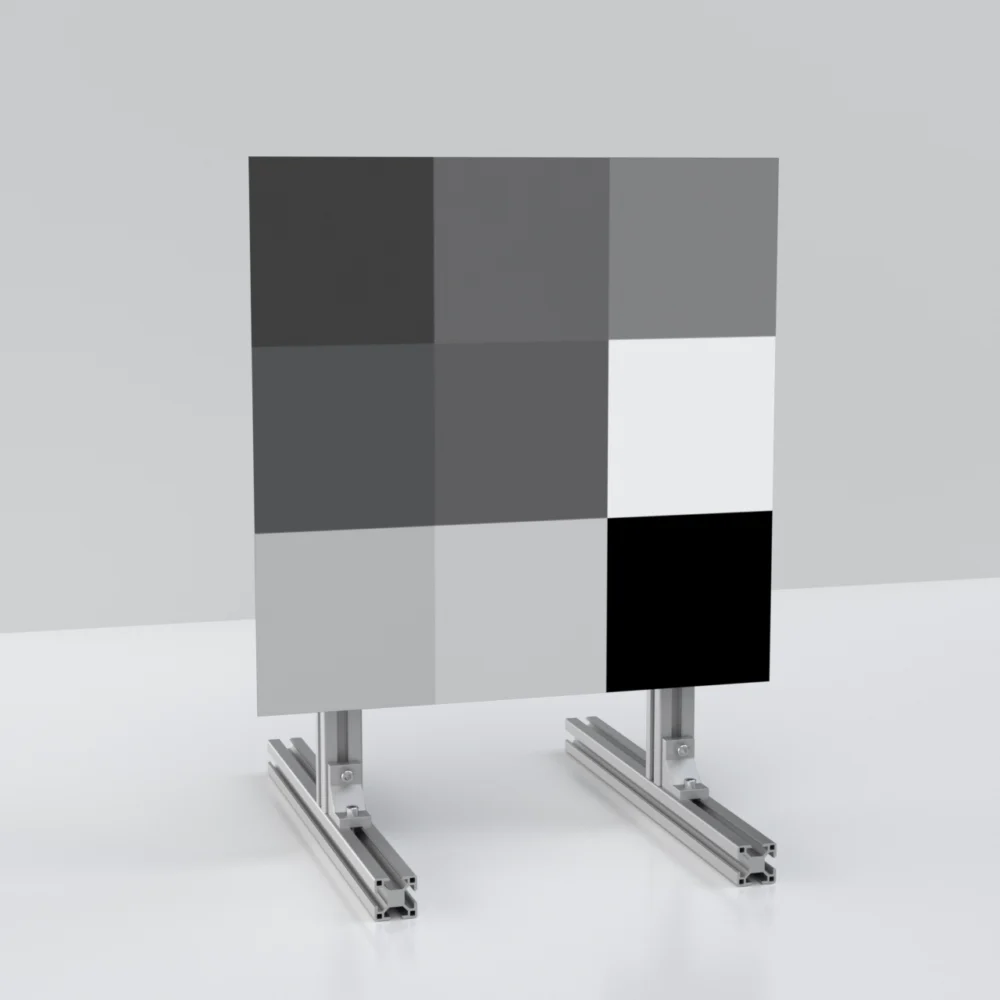
5. Specification #4: Size Requirements
What It Means
Target size: Physical dimensions (width × height) of the calibrated reflectance surface.
Critical concept: Target must be large enough to capture the laser beam spot at your test distance.
Why It Matters
Beam divergence causes spot size to grow with distance:
Spot Diameter = Distance × tan(Beam Divergence)
If target is too small:
- Only part of laser beam hits target
- Remainder hits background (unknown reflectance)
- Measured value = mix of target + background → invalid
Example:
- Testing at 100m
- Beam divergence: 0.1° (typical automotive LiDAR)
- Spot size: 100m × tan(0.1°) = 17.5cm diameter
- Target size: 20×20cm
Coverage: Beam mostly on target but ~20% at edges hits background Result: If background is different reflectance, measurement contaminated by ±4-10%
The 3× Rule
Industry best practice: Target diameter ≥ 3× spot diameter
Rationale:
- Ensures >90% of beam energy hits calibrated surface
- Background contamination <10% (acceptable for most applications)
- Provides margin for alignment errors (target slightly off-center)
Example calculation:
- Distance: 100m
- Beam divergence: 0.1°
- Spot diameter: 100m × tan(0.1°) = 17.5cm
- Minimum target size: 3 × 17.5cm = 52.5cm
- Recommended: 1000×1000mm (1m × 1m) target ✓
Sizing Chart by Distance
Assuming 0.1° beam divergence (typical automotive LiDAR):
| Test Distance | Spot Diameter | 3× Rule Minimum | Recommended Standard Size | Calibvision Model |
|---|---|---|---|---|
| 5m | 0.9cm | 2.6cm | A6 (105mm) or A5 (148mm) | DRS-R[XX]L-A5 |
| 10m | 1.7cm | 5.2cm | A5 (148mm) or A4 (210mm) | DRS-R[XX]L-A4 |
| 25m | 4.4cm | 13.1cm | A4 (210mm) or A3 (297mm) | DRS-R[XX]L-A4 |
| 50m | 8.7cm | 26.2cm | 500×500mm | DRS-R[XX]L-500 |
| 75m | 13.1cm | 39.3cm | 500×500mm | DRS-R[XX]L-500 |
| 100m | 17.5cm | 52.4cm | 1000×1000mm | DRS-R[XX]L-1000 |
| 150m | 26.2cm | 78.7cm | 1000×1000mm | DRS-R[XX]L-1000 |
| 200m | 35.0cm | 104.9cm | 1500×2000mm | DRS-R[XX]L-1500 |
| 250m | 43.7cm | 131.2cm | 2000×3000mm | DRS-XL[XX]-2000 |
| 300m | 52.4cm | 157.3cm | 3000×5000mm (max) | DRS-XL[XX]-3000 |
Important: Check YOUR LiDAR’s beam divergence in datasheet—can range from 0.03° (narrow) to 0.3° (wide). Adjust calculations accordingly.
Beam Divergence Reference
| LiDAR Type | Typical Beam Divergence | Notes |
|---|---|---|
| Mechanical spinning (Velodyne) | 0.18-0.3° | Wider beam |
| Solid-state flash (Ouster) | 0.1-0.2° | Moderate |
| MEMS scanning | 0.05-0.12° | Tighter beam |
| Fiber laser (Luminar Iris) | 0.03-0.05° | Very narrow |
| ToF sensor (smartphones) | 0.5-2° | Very wide (short range) |
Multi-Point Return Consideration
For statistical confidence, you want multiple measurement points on target:
Minimum: 4 points (defines plane) Better: 9 points (3×3 grid, enables outlier rejection) Ideal: 25+ points (5×5 grid, robust statistics)
For scanning LiDAR with angular resolution 0.2°:
At 50m distance:
- Horizontal beam spacing: 50m × tan(0.2°) = 17cm
- To get 3 beams horizontally: Need 3 × 17cm = 51cm width
- Vertical: Similar calculation
Recommendation: 1m × 1m target at 50m ensures 5-10 points hit surface → good statistics
Field of View Coverage (Fusion Targets)
For camera-LiDAR fusion calibration, target should subtend significant portion of sensor FOV:
Rule: Target subtends 2-10° of FOV
Example:
- Camera FOV: 60° horizontal
- Target should subtend: 1.2-6° (2-10% of FOV)
- At 20m distance: 20m × tan(6°) = 2.1m wide
For fusion targets (DRS-F series), larger is better:
- 1-2m typical for 10-50m distance
- Ensures both camera (sees geometric features) and LiDAR (detects reflectance zones) work well
How to Calculate Your Requirement
Step 1: Find beam divergence
- Check LiDAR datasheet: “Beam divergence” or “Instantaneous FOV (IFOV)”
- Typical: 0.05-0.2°
Step 2: Determine maximum test distance
- What’s the farthest you’ll test?
- Example: 150m
Step 3: Calculate spot size
Spot Diameter = Distance × tan(Beam Divergence)
Example: 150m × tan(0.1°) = 26cm
Step 4: Apply 3× rule
Minimum Target Size = 3 × Spot Diameter
Example: 3 × 26cm = 78cm
Step 5: Round up to standard size
- 78cm → 1000mm (1m) standard size ✓
Cost vs. Size Trade-off
| Size | Approximate Cost | When to Use |
|---|---|---|
| A6 (105×148mm) | $400-600 | <10m testing only |
| A4 (210×297mm) | $500-800 | <25m testing |
| 500×500mm | $800-1,200 | 25-75m testing |
| 1000×1000mm | $1,500-2,500 | 50-150m testing |
| 1500×2000mm | $3,000-5,000 | 150-250m testing |
| 2000×3000mm | $5,000-8,000 | 200-300m testing |
| 3000×5000mm | $10,000-15,000 | 250m+ or special applications |
Budget tip: If testing multiple distances, buy appropriately sized target for each range:
- Small (A4) for <25m: $600
- Medium (1m) for 50-100m: $2,000
- Large (2m) for >150m: $5,000
- Total: $7,600 (covers all distances properly)
vs. buying one marginal 1m target for all distances:
- Works okay for <100m
- Inadequate for 150m+ (high uncertainty)
- Total: $2,000 (but results questionable at long range)
For safety-critical automotive: Spend the extra for proper sizing—$5,000 difference is trivial compared to recall risk.
Practical Verification
After purchase, verify target is large enough:
Method:
- Set up at maximum test distance
- View target through LiDAR’s point cloud visualization
- Count how many points hit target
- Goal: ≥9 points (3×3 grid minimum), ≥25 points ideal
If fewer than 9 points:
- Target too small for this distance
- Either move closer or get larger target
6. Specification #5: Environmental Stability
What It Means
Environmental stability describes how much the target’s reflectance changes with temperature, humidity, and UV exposure.
Typical specs:
- Temperature coefficient: %/°C (reflectance change per degree Celsius)
- Humidity effect: % change at 85% relative humidity
- UV stability: % change after X hours of UV exposure
Why It Matters
Outdoor automotive testing experiences extreme conditions:
- Morning: 15°C, target in shade
- Afternoon: Target in direct sunlight, surface temperature 60°C
- Temperature swing: 45°C
With poor stability (0.1%/°C):
- 45°C × 0.1%/°C = 4.5% reflectance change
- Your “50%” target is now 47.75% or 52.25%
- Exceeds ±2% accuracy specification → calibration invalidated
With good stability (0.01%/°C):
- 45°C × 0.01%/°C = 0.45% reflectance change
- “50%” target is 49.775% or 50.225%
- Well within ±2% spec → calibration remains valid ✓
Temperature Effects: Three Sources
1. Target Surface Temperature
Mechanism: Thermal expansion and material optical properties change
Impact on reflectance:
- Ceramic substrates: <0.01%/°C (excellent)
- Aluminum substrates: 0.01-0.02%/°C (good)
- ABS plastic: 0.05-0.1%/°C (poor for outdoor use)
Outdoor testing scenario:
- Target in direct sunlight
- Surface temperature: 50-70°C (vs. 20°C calibration temperature)
- Temperature difference: 30-50°C
Reflectance shift:
- Ceramic: 30°C × 0.01%/°C = 0.3% ✓
- Aluminum: 30°C × 0.02%/°C = 0.6% ✓
- ABS: 30°C × 0.08%/°C = 2.4% ❌ (exceeds tolerance)
2. LiDAR Sensor Internal Temperature
Mechanism: Laser power and detector sensitivity vary with temperature
Automotive LiDAR spec: Operate -40°C to +85°C (125°C internal electronics swing)
Good LiDAR design: Temperature compensation built-in, maintains <5% performance variation
Your responsibility: Verify compensation works by testing with stable reference targets across temperature range
3. Air Temperature (Atmospheric)
Mechanism: Air density affects speed of light and atmospheric absorption
Impact: Usually negligible (<0.1% for distances <300m)
Exception: High humidity at 1550nm wavelength (water vapor absorption increases)
Humidity Effects
Mechanism: Some coating materials absorb moisture, altering reflectance
Test condition: 85% relative humidity @ 30°C (challenging but realistic tropical/rainy conditions)
Quality targets: <2% reflectance change at 85% RH
Poor targets: 5-10% change (hygroscopic coatings)
Real-world example: Testing in morning (60% RH, 18°C):
- 50% target measures correctly
Testing in afternoon rain (95% RH, 22°C):
- Same target now 53% (moisture absorption)
- 6% error invalidates testing
Calibvision DRS series: Sealed coating, <1.5% change at 85% RH ✓
UV Degradation
Mechanism: UV radiation breaks down polymer binders in coatings, causes pigment fading
Critical for outdoor automotive testing: Targets exposed to sunlight for weeks/months during validation campaigns
Test standard: ASTM G154 (UV lamp exposure)
Quality grades:
| UV Exposure (hours) | Reflectance Change | Quality Grade |
|---|---|---|
| 2000 hours | <1% | Excellent (outdoor-rated) |
| 1000 hours | <3% | Good (occasional outdoor) |
| 500 hours | <5% | Fair (indoor preferred) |
| 100 hours | >10% | Poor (indoor only) |
Real-world equivalence:
- 1000 hours UV lamp ≈ 1 year outdoor exposure in temperate climate
- 2000 hours ≈ 2-3 years
Recommendation for automotive: Targets rated for ≥1000 hours UV stability if used outdoors regularly
Environmental Stability Specifications
Calibvision DRS series (outdoor-rated aluminum):
- Temperature: <1% change over -20°C to +60°C (±0.012%/°C)
- Humidity: <2% change at 85% RH
- UV: <3% change after 1000 hours ASTM G154
- Waterproof: IP65 equivalent (light rain, splashing)
Comparison to generic targets:
| Specification | Calibvision DRS | Generic “Gray Card” | Generic Painted Target |
|---|---|---|---|
| Temp coefficient | 0.012%/°C | Not specified | 0.1-0.3%/°C |
| Humidity (85% RH) | <2% | Not tested | 5-15% |
| UV (1000h) | <3% | Not rated | 10-30% fade |
| Waterproof | Yes (IP65) | No | Depends |
| Outdoor use | Yes ✓ | No ❌ | Limited ⚠️ |
How to Evaluate
On datasheet/certificate, look for:
✓ Temperature coefficient explicitly stated
- “±0.02%/°C” or “<1% change from -20°C to +60°C”
✓ Operating temperature range
- Should cover your test environment
- Automotive: -40°C to +85°C typical requirement
✓ Humidity rating
- “<2% change at 85% RH” or similar
- Indicates testing was done
✓ UV stability certification
- “ASTM G154 1000 hours: <3% degradation”
- Or equivalent test (QUV, xenon arc)
✓ Waterproof rating
- IP65 or IP67 (outdoor automotive testing)
- Or explicit “outdoor-rated” designation
Red Flags
❌ No environmental specifications at all
- Silent on temperature, humidity, UV
- Indicates target not designed for outdoor/variable conditions
❌ “Indoor use only” or “climate-controlled environment recommended”
- Cannot use for outdoor automotive testing
- Temperature sensitivity too high
❌ Humidity warning
- “Do not expose to moisture”
- “Store in <40% RH”
- Hygroscopic coating, not suitable for field testing
❌ UV degradation warning
- “Avoid prolonged sun exposure”
- “Cover when not in use”
- Coating will fade over time
Cost vs. Stability
Indoor-only targets (ceramic, basic ABS):
- Cost: $500-1,500
- Stability: Excellent in controlled environment
- Use case: Lab testing, development
Outdoor-rated targets (sealed aluminum):
- Cost: $1,500-5,000
- Stability: Good across temperature, humidity, UV
- Use case: Automotive validation, field testing
Premium outdoor (advanced coatings):
- Cost: $3,000-8,000
- Stability: Excellent even in harsh conditions
- Use case: Multi-year outdoor campaigns, extreme environments
Practical Mitigation Strategies
Even with good stability, best practices:
Temperature:
- Allow 30-minute stabilization after setup (target reaches ambient)
- Record target surface temperature (IR thermometer)
- Test at consistent time of day when possible
- Use sunshade for targets in direct sun
Humidity:
- Record relative humidity during testing
- Avoid testing immediately after rain (surface moisture)
- Store targets indoors when not in use
- Allow targets to dry if gotten wet
UV:
- Cover targets when not actively testing
- Store indoors between test sessions
- Inspect targets annually for fading (visual check)
- Re-calibrate per schedule (catches degradation)
General:
- Document environmental conditions in test log
- Compare to baseline (indoor, 20°C) periodically
- If results drift >2%, investigate environmental cause
- Replace targets if degradation confirmed (visual or measured)
7. Specification #6: Certification and Traceability
What It Means
Certification: Documentation that target’s reflectance has been measured by a qualified lab
Traceability: Chain of measurements linking your target to international reference standards (NIST, PTB, NPL)
Key concept: Without traceability, you can’t prove your measurements are accurate or compare results to other labs/countries.
Why It Matters
Regulatory compliance:
- ISO 26262 (automotive functional safety): Requires traceable calibration for safety-critical sensors
- FDA (medical devices): Traceability to national standards
- Aerospace (DO-178C): Similar requirements
Legal defensibility:
- Product liability lawsuit: “How do you know your calibration was accurate?”
- Without traceability: “We used a gray target we bought online”
- With traceability: “We used NIST-traceable target with ±2% certified accuracy, certificate serial #12345”
Inter-laboratory comparison:
- Your lab: Target measures 50.1%
- Supplier’s lab: Target measures 50.3%
- Both traceable to NIST → Can demonstrate agreement within uncertainty
- Not traceable → No basis for comparison, disputes arise
The Traceability Chain
Level 1: National Metrology Institutes (NMI)
- NIST (USA)
- PTB (Germany)
- NPL (UK)
- KRISS (Korea)
- NIM (China)
Function: Maintain primary reference standards (definitive values)
Level 2: Accredited Calibration Laboratories
- ISO/IEC 17025 accredited
- Calibrate “working standards” against NMI primary standards
- Issue certificates with traceability statements
Level 3: Manufacturers (Calibvision)
- Measure production targets using working standards
- Issue certificates stating: “Traceable to NIST through [Lab Name], accreditation #[XYZ]”
Level 4: End Users (You)
- Receive target with certificate
- Use for calibrating your devices
- Extend traceability chain: Your device → Your target → NMI
What a Proper Certificate Includes
✓ 1. Unique identification
- Serial number: “DRS-R50L-1000-SN987654”
- Date of calibration: “2024-12-15”
- Next calibration due: “2026-12-15” (24-month interval typical)
✓ 2. Measured values
- Reflectance at specified wavelengths:
- 850nm: 49.8%
- 905nm: 50.1%
- 940nm: 50.2%
- 1550nm: 50.3%
- Not just “50% nominal”—actual measured values
✓ 3. Measurement uncertainty
- “Reflectance: 50.1% with expanded uncertainty ±1.0% (k=2, 95% confidence)”
- k=2 means 95% confidence interval (standard)
- Shows uncertainty budget was calculated per ISO GUM
✓ 4. Traceability statement
- “Traceable to NIST through [Accredited Lab Name]”
- “Calibration performed per ISO 17025 accreditation #12345”
- Links your target to national standards
✓ 5. Measurement conditions
- Temperature: 23°C ±2°C
- Humidity: 45% RH
- Measurement geometry: 8° illumination, diffuse collection (standard for reflectance)
✓ 6. Calibration method
- Equipment used: “Spectrometer: Model XYZ, Serial #123”
- Reference standard: “BaSO₄ working standard, NIST-traceable, Cert #ABC”
- Procedure: “Per ASTM E1347”
✓ 7. Additional data
- Lambertian conformity: “>95% across ±60°”
- Spectral curve: Graph of reflectance vs. wavelength 400-2000nm
- Angular response: Table showing reflectance at 0°, 15°, 30°, 45°, 60°
✓ 8. Laboratory information
- Lab name and address
- ISO 17025 accreditation number
- Technician name and signature
- QA approval signature
Red Flags: Invalid or Inadequate Certificates
❌ No certificate at all
- “Target is 50% gray” with no documentation
- Impossible to verify, no traceability
❌ Certificate lacks measurement data
- Just says “50% reflectance” without measured value
- Not a real calibration—just a claim
❌ No uncertainty statement
- “Reflectance: 50%” with no ±X%
- Violates ISO GUM—not a proper measurement
❌ No traceability statement
- “Calibrated in-house” without ISO 17025 accreditation
- No link to national standards—cannot prove accuracy
❌ Traceability to unknown standard
- “Traceable to our internal reference”
- “Calibrated against manufacturer standard”
- Not linked to NMI (NIST/PTB)—breaks chain
❌ Expired calibration
- Certificate date: 2020
- Current date: 2025
- Recommended re-cal interval: 2 years
- Target is out of calibration (3 years overdue)
❌ Certificate from non-accredited lab
- No ISO 17025 accreditation number
- Cannot verify lab’s competence
- Traceability questionable
ISO/IEC 17025: What It Means
ISO/IEC 17025 is the international standard for calibration and testing laboratories.
Accreditation process:
- Lab applies to national accreditation body (e.g., A2LA in USA, UKAS in UK)
- Audit of procedures, equipment, personnel training, quality system
- Proficiency testing (lab measures known samples, results verified)
- Granted accreditation for specific scope (e.g., “Optical reflectance, 400-2000nm”)
- Annual surveillance audits to maintain
What accreditation guarantees:
- Lab has demonstrated competence
- Measurement procedures validated
- Equipment calibrated and maintained
- Uncertainties properly calculated
- Results are internationally recognized
Without ISO 17025: Lab might be competent, but no way to verify—accreditation is the proof.
Re-Calibration Intervals
Targets don’t maintain calibration forever. Recommended re-cal intervals:
| Application | Re-Cal Interval | Rationale |
|---|---|---|
| Automotive safety (ASIL-D) | 12 months | Regulatory requirement, safety-critical |
| Aerospace/defense | 12-24 months | Industry standard |
| Industrial QC | 24 months | Balance cost vs. accuracy |
| Research (publications) | 12-24 months | Peer review requires current calibration |
| General testing | 36 months | Cost-effective for non-critical use |
Also re-calibrate if:
- Target dropped or damaged
- Visible contamination or wear
- Stored in harsh environment (outdoor, high temp/humidity)
- Measurement results seem inconsistent
- Customer or regulator requires it
Cost: Typically 30-40% of original purchase price
Planning: Budget for re-cal from the start
- Initial purchase: $2,000
- Re-cal (2 years): $700
- Re-cal (4 years): $700
- 5-year total: $3,400 ($680/year amortized)
Calibration Hierarchy
Not all calibrations are equal:
Tier 1: NIST/PTB direct calibration
- You send target directly to NIST
- Cost: $5,000-15,000
- Lead time: 6-12 months
- Use case: Primary reference standards, metrology labs
Tier 2: ISO 17025 lab (NIST-traceable)
- Commercial lab calibrates target
- Cost: $800-2,000
- Lead time: 2-4 weeks
- Use case: Working standards, automotive/aerospace testing (Calibvision uses this)
Tier 3: Manufacturer in-house (with working standard)
- Calibvision calibrates production targets against its ISO 17025 working standard
- Cost: Included in purchase price
- Lead time: Immediate (ships with target)
- Use case: Production targets for end users
Tier 4: Manufacturer in-house (no traceability)
- “Calibrated in-house” without ISO 17025 or working standard
- Cost: Often free or low-cost
- Use case: Not suitable for regulated industries
- Problem: No traceability, cannot verify accuracy
Tier 5: No calibration
- “50% gray target” from non-specialized supplier
- Cost: Cheap ($20-200)
- Use case: Visual arts, rough approximations
- Problem: Unusable for engineering calibration
Calibvision provides Tier 3 calibration (traceable to Tier 2 lab with ISO 17025) for all DRS series targets.
How to Verify Traceability
Request these documents before purchase:
- Sample calibration certificate
- Review format, check all required elements present
- ISO 17025 accreditation certificate
- Verify accreditation body (A2LA, UKAS, etc.)
- Check scope includes optical reflectance
- Verify not expired
- Calibration lab information
- Name and location of lab
- Accreditation number
- Can independently verify: Search accreditation database
Questions to ask supplier:
- “What lab performs your calibrations?”
- “Can you provide their ISO 17025 accreditation number?”
- “Is the calibration traceable to NIST or PTB?”
- “What is the measurement uncertainty?”
- “What is the recommended re-calibration interval?”
If supplier cannot answer these questions → Look elsewhere.
International Recognition
ILAC MRA (International Laboratory Accreditation Cooperation Mutual Recognition Arrangement):
Calibration certificates from ISO 17025 labs in any signatory country are mutually recognized.
Practical benefit:
- Target calibrated in China (Calibvision) → Recognized in USA, Europe, Japan
- No need to re-calibrate in each country
- Facilitates international trade and collaboration
Member countries: 100+ including all major economies
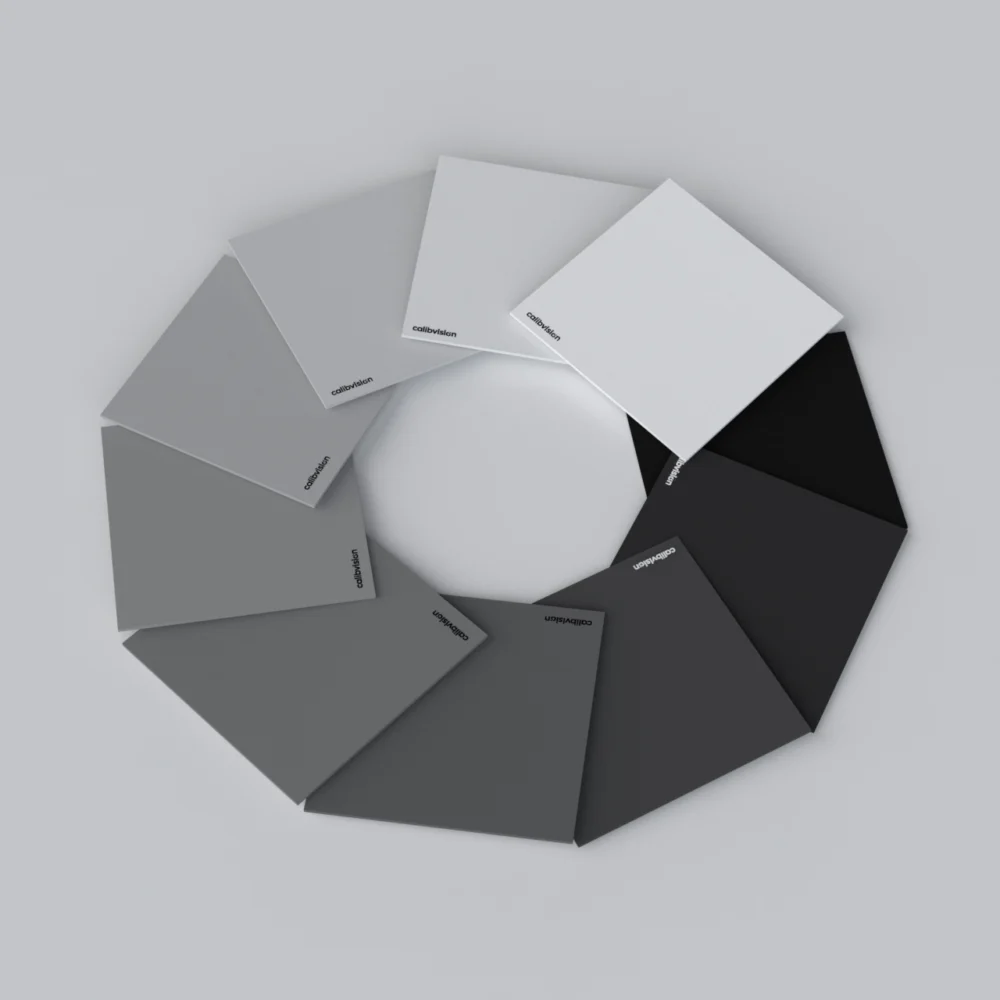
8. Specification #7: Substrate Material
What It Means
Substrate: The rigid backing material onto which the calibrated reflectance coating is applied.
Common substrates:
- Ceramic (alumina, glass-ceramic)
- Glass (borosilicate, float glass)
- Aluminum (6061-T6 or similar alloys)
- ABS plastic or composite
- Film/flexible (mylar, vinyl)
Why It Matters
Substrate affects:
- Dimensional stability (flatness over time/temperature)
- Durability (impact resistance, lifespan)
- Environmental suitability (indoor vs. outdoor)
- Cost (ranges from $200 to $5,000 for same size)
Wrong substrate choice:
- Ceramic target for outdoor use → fragile, breaks if dropped or temperature-shocked
- ABS target for precision work → warps with temperature, insufficient flatness
- Film target for any serious work → wrinkles, impossible to keep flat
Substrate Comparison Matrix
| Property | Ceramic | Glass | Aluminum | ABS/Composite | Film |
|---|---|---|---|---|---|
| Flatness | Excellent (±0.1mm) | Excellent (±0.05mm) | Good (±0.2mm) | Fair (±0.5mm) | Poor (wrinkles) |
| Dimensional stability | Excellent | Excellent | Good | Fair | Poor |
| Temperature range | -40 to +200°C | -40 to +150°C | -40 to +85°C | -20 to +60°C | -10 to +40°C |
| Impact resistance | Poor (brittle) | Poor (brittle) | Excellent | Good | N/A |
| Outdoor durability | Not recommended | Fair (needs UV protection) | Excellent | Fair | Poor |
| Weight | Heavy | Heavy | Light | Light | Very light |
| Maximum size | ~500mm | ~300mm | 5000mm+ | 1500mm | Unlimited |
| Cost (1m size) | $$$$$ | $$$$$ | $$$ | $$ | $ |
| Best for | Lab precision | Optical benches | Outdoor testing | Indoor general | Avoid for calibration |
Ceramic Substrates
Materials:
- Alumina (Al₂O₃) ceramic
- Glass-ceramic (Zerodur, Macor)
Advantages:
- ✓ Superior flatness: ±0.1mm across surface
- ✓ Extremely stable dimensions (thermal expansion ≈0)
- ✓ Long lifespan (10+ years indoor)
- ✓ No outgassing (can use in vacuum chambers)
Disadvantages:
- ❌ Fragile—shatters if dropped
- ❌ Thermal shock sensitive (don’t take from -20°C to +60°C rapidly)
- ❌ Expensive ($3,000-8,000 for 1m size)
- ❌ Limited sizes (<500mm typically)
- ❌ Heavy (difficult to transport)
Best for:
- Laboratory precision measurements
- Climate-controlled environments
- Metrology applications requiring ultimate flatness
- When target never moved
Not suitable for:
- Outdoor testing (thermal shock risk)
- Field work (too fragile)
- Large sizes (>500mm not available)
Calibvision offering: Premium ceramic substrates available on request for research applications
Glass Substrates
Materials:
- Borosilicate glass (low thermal expansion)
- Float glass (standard window glass)
Advantages:
- ✓ Excellent flatness: ±0.05mm (better than ceramic!)
- ✓ Transparent options (for transmission measurements)
- ✓ Easy to clean (smooth surface)
- ✓ Chemical resistance
Disadvantages:
- ❌ Fragile (even more than ceramic)
- ❌ Limited sizes (<300mm practical)
- ❌ Expensive
- ❌ Heavier than aluminum
Best for:
- Optical bench setups
- Transmission + reflection measurements
- Laboratory use where ultimate flatness required
Not suitable for:
- Any field work
- Large targets
- High-traffic environments
Calibvision offering: Glass substrates available for specialized applications (transmission testing)
Aluminum Substrates (Most Popular)
Materials:
- 6061-T6 aluminum alloy (most common)
- 5052 aluminum (marine-grade)
- Anodized surface (corrosion protection)
Advantages:
- ✓ Large sizes possible (up to 3×5m)
- ✓ Lightweight (easy to transport and mount)
- ✓ Impact resistant (won’t shatter if dropped)
- ✓ Outdoor-rated (corrosion resistant with proper coating)
- ✓ Mounting holes easily drilled
- ✓ Good flatness (±0.2mm achievable)
- ✓ Cost-effective for large sizes
Disadvantages:
- ❌ Thermal expansion (±0.02%/°C linear expansion)
- ❌ Can warp if overheated (>100°C)
- ❌ Requires anti-corrosion treatment (anodizing or coating)
Best for:
- Outdoor automotive testing (most common use case)
- Large-format targets (1-5m)
- Field work (durable, portable)
- When cost matters but need decent flatness
Thermal expansion consideration:
1m aluminum target, 40°C temperature change:
- Linear expansion: 1000mm × 23×10⁻⁶/°C × 40°C = 0.9mm
- Still much less than substrate thickness (3-5mm)
- Flatness maintained within ±0.3mm → acceptable for most applications
Calibvision DRS-L and DRS-XL series: Aluminum substrates, outdoor-rated with waterproof coating
ABS/Composite Substrates
Materials:
- ABS plastic (Acrylonitrile Butadiene Styrene)
- Fiber-reinforced composites
- PVC board
Advantages:
- ✓ Cost-effective ($400-800 for 1m)
- ✓ Lightweight
- ✓ Easy to cut to custom shapes
- ✓ Impact resistant (won’t break)
Disadvantages:
- ❌ Poor dimensional stability (warps with temperature)
- ❌ Limited temperature range (-20 to +60°C)
- ❌ Lower flatness (±0.5mm typical)
- ❌ Outgasses (VOCs, not suitable for clean rooms)
- ❌ Degrades faster (5-7 year lifespan)
Best for:
- Indoor testing only
- Educational purposes
- Budget-constrained projects
- Non-critical applications (accuracy ±5% acceptable)
Not suitable for:
- Precision measurements (flatness inadequate)
- Outdoor use (warping risk)
- High-temperature environments
- Safety-critical automotive testing
Calibvision offering: ABS substrates available for entry-level DRS-F fusion targets (indoor use)
Film/Flexible Substrates (Avoid)
Materials:
- Mylar (PET film)
- Vinyl
- Paper
Advantages:
- ✓ Very cheap ($50-200)
- ✓ Rollable for transport
- ✓ Very large sizes possible
Disadvantages:
- ❌ Cannot maintain flatness (wrinkles, waves)
- ❌ Requires rigid backing to use (defeats purpose)
- ❌ Poor accuracy (±10% typical)
- ❌ Short lifespan (<2 years)
- ❌ No traceability (uncalibrated)
Use case: Background targets for large areas (not precision calibration)
Calibvision does not offer film substrates for calibration applications
How to Choose Substrate
Decision tree:
Q1: Indoor or outdoor use?
- Indoor → Ceramic, glass, or aluminum
- Outdoor → Aluminum only
Q2: What’s your maximum size requirement?
- <500mm → Any substrate possible
- 500-1500mm → Aluminum or ABS
- 1500mm → Aluminum only
Q3: What accuracy do you need?
- ±0.5-1% (metrology) → Ceramic or glass
- ±2% (professional) → Aluminum or ceramic
- ±5% (industrial) → Aluminum or ABS
Q4: What’s your handling scenario?
- Fixed installation → Ceramic acceptable
- Frequent moves → Aluminum (impact resistant)
- Field work → Aluminum only
Q5: What’s your budget?
- High ($3,000-8,000 per target) → Ceramic/glass option
- Medium ($1,000-3,000) → Aluminum
- Low ($400-800) → ABS
- Very low (<$400) → Likely inadequate for serious work
Recommendation by Application
Automotive LiDAR outdoor testing: → Aluminum substrate (DRS-R[XX]L series)
- Outdoor-rated, large sizes, durable
Laboratory precision measurements: → Ceramic substrate (special order)
- Ultimate flatness and stability
Indoor development/algorithm training: → Aluminum or ABS (depending on budget)
- ABS adequate for indoor if ±5% accuracy okay
Camera-LiDAR fusion (indoor): → ABS with geometric patterns (DRS-F series)
- Cost-effective, sufficient flatness for fusion
Camera-LiDAR fusion (outdoor): → Aluminum with geometric patterns (DRS-F series premium)
- Weather-resistant, maintains geometry
Substrate Maintenance
Ceramic/Glass:
- Handle with extreme care (white gloves)
- Never temperature-shock (gradual temp changes only)
- Clean with IPA and optical-grade cloths
- Store in padded case
Aluminum:
- Inspect for corrosion annually
- If anodizing damaged, can be re-treated
- Clean with mild soap + water, or IPA
- Store dry to prevent oxidation
ABS:
- Avoid prolonged sun exposure (warping)
- Store flat (prevents bowing)
- Clean with mild soap + water
- Replace if warping observed (>5mm bow)
9. Decision Framework: Matching Specs to Applications
Now that we’ve covered all seven specifications, here’s how to put it together for your specific use case.
Use Case #1: Automotive LiDAR Validation (Highway Autonomy)
Requirements:
- SAE Level 3 ADAS system
- 905nm LiDAR, 200m maximum range
- Outdoor testing required
- Must meet ISO 26262 ASIL-D
Recommended specifications:
| Spec | Requirement | Rationale |
|---|---|---|
| Reflectance accuracy | ±2% | Safety-critical, regulatory compliance |
| Wavelength range | 850-950nm (LiDAR-specific) | Matches 905nm LiDAR |
| Lambertian conformity | >95% | Real-world angles (0-30°) |
| Size | 2m × 3m for 200m testing | 3× rule for 0.1° beam divergence |
| Environmental stability | <1%/40°C, <2% at 85% RH | Outdoor testing all seasons |
| Certification | NIST-traceable ±2% | ISO 26262 requirement |
| Substrate | Aluminum | Outdoor-rated, large size capable |
Recommended targets:
- DRS-R10L-2000×3000 (10%, large format)
- DRS-R50L-2000×3000 (50%, large format)
- DRS-R90L-2000×3000 (90%, large format)
Budget: $12,000-15,000 (3-target set)
Re-cal: Annual (12 months)
5-year TCO: $15,000 + (4 × $4,500) = $33,000 ($6,600/year)
Use Case #2: Industrial Robot Vision (Indoor, Close-Range)
Requirements:
- Monochrome camera (850nm NIR)
- 2m working distance
- Indoor factory environment
- Accuracy ±5% acceptable
Recommended specifications:
| Spec | Requirement | Rationale |
|---|---|---|
| Reflectance accuracy | ±3-5% | Non-safety-critical, QC application |
| Wavelength range | 400-900nm (NIR extended) | Matches 850nm camera |
| Lambertian conformity | 90-95% | Controlled mounting (near perpendicular) |
| Size | A4 or 500×500mm | Close range (<2m), small spot size |
| Environmental stability | Not critical | Climate-controlled indoor |
| Certification | ISO 17025 traceable | Manufacturing QC traceability |
| Substrate | ABS or aluminum | Indoor only, cost matters |
Recommended targets:
- DRS-R50N-A4 (50%, standard size)
- Optional: DRS-R10N-A4 and DRS-R90N-A4 for extended range
Budget: $500-800 (single target), $1,500 (3-target set)
Re-cal: 24 months
5-year TCO: $1,500 + (2 × $500) = $2,500 ($500/year)
Use Case #3: Research Paper (LiDAR Characterization)
Requirements:
- Academic publication
- Multiple LiDAR sensors (905nm and 1550nm)
- Indoor controlled testing
- Peer review scrutiny
Recommended specifications:
| Spec | Requirement | Rationale |
|---|---|---|
| Reflectance accuracy | ±1% or better | Research-grade, publications |
| Wavelength range | Full spectrum (200-2000nm) | Covers both 905nm and 1550nm |
| Lambertian conformity | >98% | Rigorous methodology required |
| Size | 1m × 1m | Indoor, up to 100m distance |
| Environmental stability | Controlled indoor | Lab environment |
| Certification | NIST-traceable with uncertainty budget | Peer review requirement |
| Substrate | Ceramic (flatness critical) | Precision measurements |
Recommended targets:
- DRS-R10F-1000 (10%, full spectrum, ceramic)
- DRS-R30F-1000 (30%, full spectrum)
- DRS-R50F-1000 (50%, full spectrum)
- DRS-R70F-1000 (70%, full spectrum)
- DRS-R90F-1000 (90%, full spectrum)
Budget: $15,000-20,000 (5-target premium set)
Re-cal: 12 months (research standards)
5-year TCO: $20,000 + (4 × $7,000) = $48,000 ($9,600/year)
Use Case #4: Startup Development (Prototype LiDAR)
Requirements:
- Early-stage development
- 905nm LiDAR prototype
- Indoor testing <50m
- Limited budget but need valid data
Recommended specifications:
| Spec | Requirement | Rationale |
|---|---|---|
| Reflectance accuracy | ±2% | Good enough for development |
| Wavelength range | 850-950nm (LiDAR-specific) | Matches 905nm |
| Lambertian conformity | >90% | Acceptable for development |
| Size | 500×500mm or 1m | Indoor <50m |
| Environmental stability | Indoor only | Controlled environment |
| Certification | ISO 17025 traceable | Enables future validation |
| Substrate | Aluminum (indoor-rated) | Balance cost and quality |
Recommended targets:
- DRS-R50L-500 (start with 50% only)
- Add DRS-R10L-500 and DRS-R90L-500 later when needed
Budget Phase 1: $800 (single 50% target) Budget Phase 2: +$1,600 (add 10% and 90%) Total: $2,400
Re-cal: 24 months (non-safety-critical)
Strategy: Start minimal, expand as development progresses. Acceptable for internal work, will need upgrade for production validation.
Use Case #5: Camera-LiDAR Sensor Fusion
Requirements:
- RGB camera + 905nm LiDAR
- Extrinsic calibration (relative pose)
- Indoor/outdoor both needed
- 10-50m testing distance
Recommended specifications:
| Spec | Requirement | Rationale |
|---|---|---|
| Reflectance accuracy | ±2% | LiDAR side needs precision |
| Wavelength range | 400-1100nm (visible + NIR) | Covers camera and LiDAR |
| Lambertian conformity | >95% | Both sensors need angle-independence |
| Size | 1m or larger | Fusion needs large target (FOV coverage) |
| Environmental stability | Outdoor-rated | Testing in various conditions |
| Certification | NIST-traceable | Automotive requirements |
| Substrate | Aluminum | Outdoor-rated, rigid (geometry critical) |
Recommended targets:
- DRS-F50NCA-600×450 (fusion target: ChArUco + 50% reflectance, aluminum)
- Or DRS-F50NCA-1000×750 (larger format for longer distances)
Budget: $1,500-2,500 (single combination target)
Alternative: Separate camera target (checkerboard) + LiDAR reflectance targets → more flexibility but higher cost
Re-cal: 18 months
10. Budget Planning and Total Cost of Ownership
Understanding full costs over equipment lifetime helps justify investment.
Initial Purchase Cost Breakdown
Entry-Level Setup (Education/Demos):
- 1× DRS-R50N-A4 (50%, A4 size, NIR): $600
- Protective case: $50
- Total initial: $650
Standard Professional Setup (Automotive Testing):
- 3× DRS-R Series (10%, 50%, 90%, 1m size, LiDAR-specific): $6,000
- Protective cases (×3): $300
- Mounting hardware: $500
- Total initial: $6,800
Premium Long-Range Setup (200m+ Automotive):
- 3× DRS-XL Series (10%, 50%, 90%, 2×3m, large format): $18,000
- Custom transport cases: $1,500
- Heavy-duty mounting fixtures: $2,500
- Total initial: $22,000
Ongoing Costs (5-Year Period)
Re-calibration:
| Setup Type | Re-Cal Interval | Cost per Re-Cal | 5-Year Re-Cal Cost |
|---|---|---|---|
| Entry-level (1 target) | 36 months | $200 | $400 (once at year 3) |
| Standard (3 targets) | 24 months | $2,000 | $4,000 (years 2, 4) |
| Premium (3 large targets) | 12 months | $6,000 | $24,000 (annual) |
Storage and Maintenance:
- Protective cases: Already included in initial
- Climate-controlled storage: $0 (use existing facility)
- Cleaning supplies (IPA, optical cloths): $100/year × 5 = $500
Replacement (if damaged):
- Budget 10% contingency: $680 (standard) to $2,200 (premium)
Total Cost of Ownership (5 Years)
Entry-Level:
- Initial: $650
- Re-cal (1×): $400
- Maintenance: $250
- Total: $1,300 ($260/year)
Standard Professional:
- Initial: $6,800
- Re-cal (2×): $4,000
- Maintenance: $500
- Contingency: $680
- Total: $11,980 ($2,396/year)
Premium Long-Range:
- Initial: $22,000
- Re-cal (4×): $24,000
- Maintenance: $500
- Contingency: $2,200
- Total: $48,700 ($9,740/year)
Cost vs. Risk Analysis
Scenario: Automotive OEM validating ADAS system for production
Option A: Use cheap gray cards ($100)
- Initial cost: $100
- Accuracy: ±10% (uncalibrated)
- Risk: False validation → recall
- Potential recall cost: $50M-500M
Option B: Use proper reflectance standards ($7,000)
- 5-year TCO: $12,000
- Accuracy: ±2% (NIST-traceable)
- Risk: Valid data, defensible
- Recall risk: Minimized
ROI: Spending $12,000 to reduce $50M+ risk Payback: Immediate (risk avoidance)
Decision: Obviously choose Option B
Budget Justification Template
For management approval:
CAPITAL REQUEST: Diffuse Reflectance Standards for LiDAR Calibration

PROJECT: [Your project name]
AMOUNT: $[X],000
TIMELINE: 5-year equipment lifecycle

JUSTIFICATION:
1. Regulatory Requirement:
   - ISO 26262 mandates traceable calibration (±2% accuracy)
   - Current gray cards (±10%) do not meet requirement
   - Failure to comply risks: [consequences]

2. Risk Mitigation:
   - Proper calibration prevents: [false validation, recall, liability]
   - Estimated risk exposure: $[X]M (recall cost)
   - This $[X]K investment reduces risk by >99%

3. Data Quality:
   - Traceable targets enable: [valid testing, defensible data]
   - Supports: [publications, customer confidence, regulatory approval]

4. Industry Standard:
   - All Tier-1 suppliers use traceable standards
   - Competitive requirement for: [OEM partnerships, certifications]

5. Total Cost of Ownership:
   - 5-year TCO: $[X],000 ($[X]/year amortized)
   - Alternative (cheap targets): False savings, 100× risk

RECOMMENDATION: Approve $[X],000 for [specific targets]
DECISION: [ ] Approved  [ ] Denied  [ ] Needs revision

Signature: ________________  Date: __________
Financing Options
Option 1: Capital purchase
- Pay upfront
- Own equipment
- Include in depreciation
Option 2: Lease (if available)
- Monthly payments
- Upgrade path
- Off-balance-sheet
Option 3: Calibration service
- Pay per use (rent targets for testing campaign)
- No long-term commitment
- Higher cost per use, but lower initial
Option 4: Shared resources
- Purchase as shared equipment across projects
- Amortize cost over multiple programs
- Maximize utilization
Calibvision offering: Purchase only (own equipment)
- Calibration service: Send targets back for re-cal
- No rental program currently
Cost-Saving Strategies
Strategy #1: Start minimal, expand later
- Year 1: Buy 50% target only ($800)
- Year 2: Add 10% and 90% targets ($1,600)
- Spreads cost, allows early development to start
Strategy #2: Multi-project sharing
- One set of targets shared across 3 projects
- Cost per project: ⅓ of total
- Requires coordination, but major savings
Strategy #3: Size optimization
- Don’t buy 3m targets if testing <100m
- Right-size to actual needs
- Avoid over-specification
Strategy #4: Re-calibration timing
- Non-safety-critical: 36-month interval (save on re-cal frequency)
- Safety-critical: 12-month (required, cannot compromise)
What NOT to do:
- ❌ Don’t buy cheap targets to “save money” → Waste money on invalid data
- ❌ Don’t skip re-calibration to save costs → Defeats purpose of traceability
- ❌ Don’t use makeshift targets → Liability risk far exceeds equipment cost
11. Verification Checklist Before Purchase
Use this checklist to verify targets meet your requirements before committing.
Phase 1: Supplier Evaluation
☐ Supplier reputation
- [ ] Company specializes in optical test equipment (not generic supplier)
- [ ] Website shows technical knowledge (detailed specs, application notes)
- [ ] Can provide customer references in your industry
- [ ] Responsive to technical questions (test with inquiry)
☐ Product documentation
- [ ] Detailed datasheets available
- [ ] Application notes / white papers
- [ ] Calibration certificate sample provided
- [ ] ISO 17025 accreditation certificate viewable
☐ Support capabilities
- [ ] Technical support contact information clear
- [ ] Application engineering consultations offered
- [ ] Re-calibration services available
- [ ] Warranty terms stated (1 year minimum)
Phase 2: Technical Specification Review
☐ Reflectance accuracy
- [ ] Accuracy explicitly stated: ±__% at your wavelength
- [ ] Meets your requirement: ±2% for automotive, ±5% for industrial
- [ ] Sample certificate shows actual measured values (not just nominal)
☐ Wavelength coverage
- [ ] Specified range includes your sensor wavelength
- [ ] Certificate will show reflectance at your specific wavelength
- [ ] Spectral uniformity <3% across range
- [ ] If multi-sensor, one target covers all wavelengths
☐ Lambertian conformity
- [ ] Specification states: >95% for professional, >90% minimum
- [ ] Angular response data will be included in certificate
- [ ] Tested across ±60° range minimum
☐ Size
- [ ] Calculated required size using 3× rule: ____mm
- [ ] Proposed target size meets or exceeds requirement
- [ ] If marginal, discussed with supplier and accepted risk
☐ Environmental stability
- [ ] Temperature coefficient: <_____%/°C (0.02% for outdoor)
- [ ] Humidity: <2% change at 85% RH (if outdoor use)
- [ ] UV stability: rated for outdoor if applicable
- [ ] Waterproof: IP65 or equivalent if outdoor
☐ Certification
- [ ] ISO 17025 accredited calibration lab confirmed
- [ ] Traceability to NIST/PTB/NPL explicitly stated
- [ ] Measurement uncertainty will be provided
- [ ] Re-calibration interval specified: ____months
☐ Substrate
- [ ] Material appropriate for use case (aluminum for outdoor, etc.)
- [ ] Flatness specification adequate: ±____mm
- [ ] Durability matches handling scenario
- [ ] Mounting provisions adequate (holes, brackets, etc.)
Phase 3: Certificate and Documentation Review
Request and review BEFORE purchase:
☐ Sample calibration certificate
- [ ] Contains all required elements (see Spec #6)
- [ ] Format matches your needs (can extract data for reports)
- [ ] Understandable (if questions, supplier can explain)
☐ Handling and care instructions
- [ ] Cleaning procedures specified
- [ ] Storage requirements clear
- [ ] Maintenance recommendations provided
- [ ] What voids warranty is stated
☐ Compliance documentation (if needed)
- [ ] ISO 26262 compliance statement (automotive)
- [ ] RoHS/REACH compliance (if applicable)
- [ ] ITAR status clarified (if aerospace/defense)
Phase 4: Commercial Terms
☐ Pricing
- [ ] Quote received in writing
- [ ] Breakdown clear (target, case, mounting, shipping, etc.)
- [ ] Re-calibration cost specified
- [ ] Payment terms acceptable
☐ Delivery
- [ ] Lead time confirmed: ____weeks
- [ ] Rush options available (if needed)
- [ ] Shipping method appropriate (no damage risk)
- [ ] Tracking will be provided
☐ Warranty
- [ ] Warranty period: 1 year minimum
- [ ] What is covered (manufacturing defects, accuracy drift)
- [ ] What is NOT covered (damage from misuse, contamination)
- [ ] Claim process clear
☐ Return/Exchange policy
- [ ] If target doesn’t meet needs, can return within X days?
- [ ] Restocking fee disclosed (if any)
- [ ] Process clear
Phase 5: Post-Purchase Verification
After receiving targets:
☐ Physical inspection
- [ ] Packaging adequate (no shipping damage)
- [ ] Surface pristine (no scratches, contamination)
- [ ] Substrate flat (use straightedge to check)
- [ ] Mounting hardware included (if applicable)
☐ Documentation review
- [ ] Calibration certificate included, signed
- [ ] Serial number on certificate matches target label
- [ ] All specifications as ordered
- [ ] Next calibration due date noted: ____________
☐ Functional verification
- [ ] Quick test: Measure intensity at 0° and 30°, verify cosine law (Lambertian check)
- [ ] Compare to baseline (if upgrading from previous target)
- [ ] Results reasonable (within expected range)
☐ If issues found
- [ ] Document issue (photo, measurement data)
- [ ] Contact supplier immediately
- [ ] Request: Replacement / re-calibration / explanation
- [ ] Do NOT use target for critical testing until resolved
12. Common Mistakes to Avoid
Learn from others’ expensive errors.
Mistake #1: Buying Based on Price Alone
The trap: “Target A: $200. Target B: $2,000. Let’s buy A to save money!”
Reality:
- Target A: Uncalibrated, ±10% accuracy, no traceability
- Target B: NIST-traceable, ±2% accuracy, professional-grade
Testing with Target A:
- Spend 3 weeks collecting data
- Realize target inadequate when boss asks for calibration certificate
- Data worthless, must repeat testing
- Lost: 3 weeks + $200 wasted = $15,000+ (engineer time)
Better decision: Spend $2,000 upfront, get valid data first time.
Lesson: “Cheap” is expensive if you have to do the work twice.
Mistake #2: Ignoring Wavelength Mismatch
The trap: “It looks 50% gray, so it must be 50% for my 905nm LiDAR, right?”
Reality:
- Visual appearance (550nm): 50% gray ✓
- Actual at 905nm: 35% ❌ (30% error)
Impact:
- LiDAR calibrated with 30% error
- Intensity-based classification completely wrong
- Field deployment: Misses detections → safety incident
Cost: $50M+ recall, liability, reputation
Better decision: Verify certificate shows reflectance AT 905nm, not just “visible.”
Lesson: Always match target wavelength to sensor wavelength.
Mistake #3: Undersized Targets
The trap: “Saving money—buy 500mm target instead of 1m for 100m testing.”
Reality:
- Spot size at 100m: 17.5cm (for 0.1° divergence)
- 500mm target: Barely adequate (2.9× spot, need 3×)
- 1000mm target: Proper (5.7× spot) ✓
Impact with 500mm:
- Alignment critical (±10cm error invalidates measurement)
- Wind moves target → beam walks off edge
- Background contamination: ±5-10% measurement error
Re-testing cost: Multiple failed attempts, frustration
Better decision: Spend extra $1,000 for 1m target, reliable results first time.
Lesson: 3× rule is not optional—it’s based on physics.
Mistake #4: No Traceability Documentation
The trap: “We’ll just use this gray target we found in the lab. Works fine!”
Reality:
- 6 months later: Customer audit
- Auditor: “Show me calibration certificate for reference target.”
- You: “We don’t have one…”
- Auditor: “All your data is non-compliant. Repeat testing.”
Impact:
- 6 months of data invalidated
- Project delayed 6 months while re-testing with proper targets
- Lost: $500K+ (program delay, customer dissatisfaction)
Better decision: Use traceable targets from day one, even if more expensive.
Lesson: Traceability isn’t optional for regulated industries.
Mistake #5: Skipping Re-Calibration
The trap: “Target was calibrated in 2020. It’s 2025, but it looks fine. Keep using it!”
Reality:
- Target degraded: UV exposure, contamination, coating wear
- Actual reflectance drifted from 50% to 47% (6% error)
- Don’t discover until QA catches inconsistent results
Impact:
- Past 6 months of data questionable
- Must re-validate or discard
- Customer confidence damaged
Better decision: Follow re-cal schedule (annual for safety-critical, 2-year for general).
Cost of re-cal: $600-800 Cost of invalid data: $50K-500K
Lesson: Re-calibration is cheap insurance.
Mistake #6: Wrong Substrate for Application
The trap: “Ceramic targets are best quality. Let’s buy ceramic for outdoor testing.”
Reality:
- Take ceramic target from air-conditioned vehicle (20°C) into hot sun (60°C)
- Thermal shock → target cracks
- $3,000 target destroyed
Better decision: Aluminum for outdoor (thermal shock resistant), ceramic for lab.
Lesson: Match substrate to environment, not just “best quality.”
Mistake #7: Assuming All “Diffuse” Targets Are Equal
The trap: “Vendor A and Vendor B both say ‘diffuse 50% gray.’ Same thing, right?”
Reality:
- Vendor A: Lambertian conformity 97%, ±1% accuracy, NIST-traceable
- Vendor B: Lambertian conformity 75%, ±8% accuracy, no traceability
Testing with Vendor B:
- Results vary ±15% with mounting angle
- Cannot replicate measurements
- 3 months wasted troubleshooting “sensor issues” (actually target issues)
Better decision: Demand specifications in writing, compare quantitatively.
Lesson: “Diffuse” is not a specification—demand numbers.
Mistake #8: Buying Too Many Reflectivities
The trap: “Let’s buy 10%, 20%, 30%, 40%, 50%, 60%, 70%, 80%, 90% to cover everything!”
Reality:
- 9 targets × $1,500 each = $13,500
- 90% of testing uses only 10%, 50%, 90%
- 6 targets sit unused
Better decision: Start with 10%, 50%, 90% ($4,500). Add others only if proven needed.
Lesson: Don’t over-specify. Start minimal, expand as needed.
Mistake #9: Forgetting About Mounting
The trap: “Ordered target. It arrived. How do we mount this 3m × 5m, 50kg target?”
Reality:
- Target has no mounting provisions
- Need custom fabrication: $2,000 + 3 weeks
- Testing delayed
Better decision: Specify mounting requirements when ordering (holes, brackets, sliders).
Lesson: Think through logistics BEFORE purchase.
Mistake #10: Not Involving Stakeholders
The trap: Engineer buys targets without consulting:
- Test lab (do they have space for 3m target?)
- QA (what accuracy do they need for compliance?)
- Finance (TCO not budgeted)
Reality:
- Lab: “We can’t fit 3m target in our facility.”
- QA: “ISO 26262 requires ±1% accuracy, you bought ±5%.”
- Finance: “Re-cal costs not in budget, can’t approve.”
Better decision: Requirements meeting with all stakeholders BEFORE purchase.
Lesson: Calibration targets are team decision, not individual.
13. Conclusion
Choosing diffuse reflectance standards is not about finding the “best” target—it’s about finding the right target for your specific application, requirements, and budget.
The Seven Specifications Recap
1. Reflectance Accuracy (±0.5% to ±5%) → Match to your precision requirements → Automotive/aerospace: ±2% minimum → Industrial: ±3-5% acceptable → Research: ±1% or better
2. Wavelength Range (400-2000nm) → MUST match your sensor wavelength → 905nm LiDAR needs 905nm-calibrated target → Don’t assume visible = NIR
3. Lambertian Conformity (>95% for professional) → Enables angle-independent measurements → Critical for real-world sensor orientations → <90% = unreliable for precision work
4. Size (3× spot diameter minimum) → Calculate using beam divergence → Larger is better (provides margin) → Don’t undersize to save money
5. Environmental Stability (<1%/40°C for outdoor) → Temperature coefficient critical for outdoor → Humidity and UV matter for field testing → Indoor-only targets cost less but limited use
6. Certification and Traceability (NIST/PTB required) → ISO 17025 accredited lab mandatory → Measurement uncertainty must be stated → Re-calibration intervals defined
7. Substrate Material (Aluminum for outdoor, ceramic for precision) → Match to use case (indoor vs outdoor) → Balance flatness, durability, cost → Large sizes require aluminum
Decision Framework Summary
Step 1: Define requirements
- Application (automotive, industrial, research)
- Sensor type and wavelength
- Testing environment (indoor/outdoor)
- Accuracy needs (±1%, ±2%, ±5%)
Step 2: Calculate specifications
- Required accuracy: [Your calculation]
- Wavelength range: [Your sensor ±100nm]
- Target size: [3× spot diameter]
- Lambertian conformity: >95% if automotive
Step 3: Select substrate
- Outdoor → Aluminum
- Indoor precision → Ceramic or aluminum
- Indoor budget → ABS (if ±5% okay)
Step 4: Verify traceability
- Request sample certificate
- Verify ISO 17025 accreditation
- Confirm NIST/PTB traceability
Step 5: Budget TCO
- Initial purchase: $____
- Re-cal (5 years): $____
- Total 5-year: $____
- Cost per year: $____
Step 6: Purchase and verify
- Order from reputable supplier
- Inspect upon receipt
- Verify certificate matches specs
- Perform quick functional test
Common Pitfalls to Avoid
❌ Buying on price alone (cheap = expensive if wrong) ❌ Wavelength mismatch (visual ≠ NIR) ❌ Undersized targets (violates 3× rule) ❌ No traceability (fails audits) ❌ Skipping re-calibration (data becomes invalid) ❌ Wrong substrate (ceramic outdoor → breaks) ❌ Assuming “diffuse” = adequate (demand specs)
Investment Justification
Cost of proper targets: $1,000-$20,000 (depending on application)
Cost of wrong targets:
- Invalid data → 3 months re-testing = $150K (engineer time)
- Failed audit → project delays = $500K+
- False validation → recall = $50M-500M
ROI: Immediate (risk avoidance)
Proper targets are NOT an expense—they’re insurance against catastrophic failures.
Final Recommendations
If you’re starting out:
- Contact Calibvision application engineering
- Discuss your specific requirements
- Get recommendation for target configuration
- Review sample certificate before purchasing
If you’re upgrading:
- Audit current targets (accuracy? traceability? expired calibration?)
- Identify gaps vs. requirements
- Plan phased replacement (start with most critical)
If you’re unsure:
- Better to slightly over-specify than under-specify
- Automotive: Always choose ±2% accuracy, >95% Lambertian
- When in doubt, call experts (Calibvision technical support)
Next Steps
☐ Define your requirements using Section 9 framework
☐ Calculate required specifications:
- Accuracy: ±____%
- Wavelength: ____nm (sensor) → ____-____nm range needed
- Size: Testing distance ___m × beam diverg
___° → ___mm target
☐ Review budget and get approval:
- Initial: $____
- 5-year TCO: $____
- Justification: [Risk mitigation / regulatory compliance / data quality]
☐ Contact Calibvision:
- Technical consultation: support@calibvision.com
- Quote request: sales@calibvision.com
- Discuss: Custom configurations, delivery timeline, re-cal services
☐ Place order and schedule testing:
- Lead time: ___weeks
- Testing schedule: Start ___[date]
- Stakeholders notified: [ ] Yes
Resources
Calibvision Product Lines:
- DRS-R Series: Standard Reflectance Standards
- DRS-L Series: LiDAR-Specific Targets
- DRS-F Series: Camera-LiDAR Fusion Targets
- DRS-XL Series: Extra-Large Format
Technical Guides:
- Complete Guide to Diffuse Reflectance Standards (Pillar Post)
- Understanding Lambertian Reflectance (Physics deep-dive)
- LiDAR Calibration Procedures (Step-by-step guide)
- Manufacturing Quality: Why It Matters (Cleanroom vs. conventional)
Contact Calibvision:
- Technical Support: support@calibvision.com (24-hour response)
- Sales Inquiries: sales@calibvision.com
- Application Engineering: engineering@calibvision.com (free consultation)
- Phone: +86-XXX-XXXX-XXXX (business hours)
Last updated: January 2025. Specifications and recommendations subject to technological advances and regulatory changes.